This is an overview of the process of making yarn. It's intended to show the whole journey that fiber takes over various devices and stages. It's not a detailed description of technique.
I learned to spin on a drop spindle in a class. Later I was generously given a spinning wheel, which I learned to use with trial and error, entirely self taught. I'm so happy with how this project turned out. I took nice pictures along the way to share my love of this old fashioned craft.
Start with roving.

(This isn't even the beginning. Shearing sheep is the beginning. I'm skipping that step, along with cleaning, scouring, combing, blending, and dying the wool.)

This is a blend of merino wool and other fibers (I lost the tag. Silk? Alpaca? I'm not sure, but it's lusciously soft). This came from an etsy seller. Browsing for roving on etsy is one of my favorite things to do on the internet.
Roving is combed fibers that are ready to spin. Pick an end, split into smaller strips if you prefer (I left it fat, making for longer color changes). Start spinning.

And keep spinning for hours.
Marvel at the gorgeous colors.

Marvel at how thinly you can spin after the hours of practice you have put in.

Hopefully you already decided whether to make single or double ply yarn. If it will be double ply, then hopefully you put some extra twist in the fiber. That way you can twist two strands together in the opposite direction, and hopefully achieve a balanced yarn. That's a lot of hope. In other words, plan ahead or you'll be frustrated.

This is where my wheel comes in handy. It has a built in "kate," the diagonal rack holding my bobbins. I can easily pull the yarn off those bobbins while plying it onto the center bobbin which is being spun by the wheel.

I don't think I'm very good at plying. I've read some techniques, but my fingers just don't do it well. Perhaps an intermediate level spinning class would help me figure out what I'm doing wrong. Perhaps I just need to do it slower with more patience. Plying is not my favorite part of the process.

Single spun yarn on the right bobbin, plyed yarn on the left bobbin.

Take the double ply yarn off the bobbin by winding it onto a "niddy noddy." This is a wooden stick with two perpendicular rods at the ends that you wind yarn around. You can also use a chair's back, but the niddy noddy is more compact and even.
Look how balanced my yarn is! It lays loosely on my lap like string. It's thrilling to get such plain, string-like results!

I had a single bobbin leftover. I heard that you can ply onto itself using a center-pull ball. So I wound it on a niddy noddy and then made a ball.
I love these even, green strings. They are fun to thrum. (Poor Ben had to endure me saying "Look! Look!" several times. You know you married right when he unwavering applauds your string making.)

Over-twisted single ply:

Now evened out by re-twisting in a double ply:

After coiling on the niddy noddy you can twist the hank onto itself. These knotted hanks are how yarn is often sold in stores.

But I hadn't "set the twist" yet. The yarn gets a quick soak in warm water. I added a wool wash from Fancy Tiger because it smells good.


Gently drain the water and squeeze the hanks. You want to be very careful not to agitate the yarn or it will start to felt (that is, shrink and tighten up on itself). Roll the hanks up in a towel
 .
.and press to get out the excess water.


When dry, you can wind these hanks into center pull balls. Yarn stores will offer to do this for you when you buy hanks from them. For some reason, the workers in yarn stores take FOREVER to wind yarn. I have my own swift and winder to do this at home.
I can't believe I forgot to photograph that part! Here's what it would have looked like:

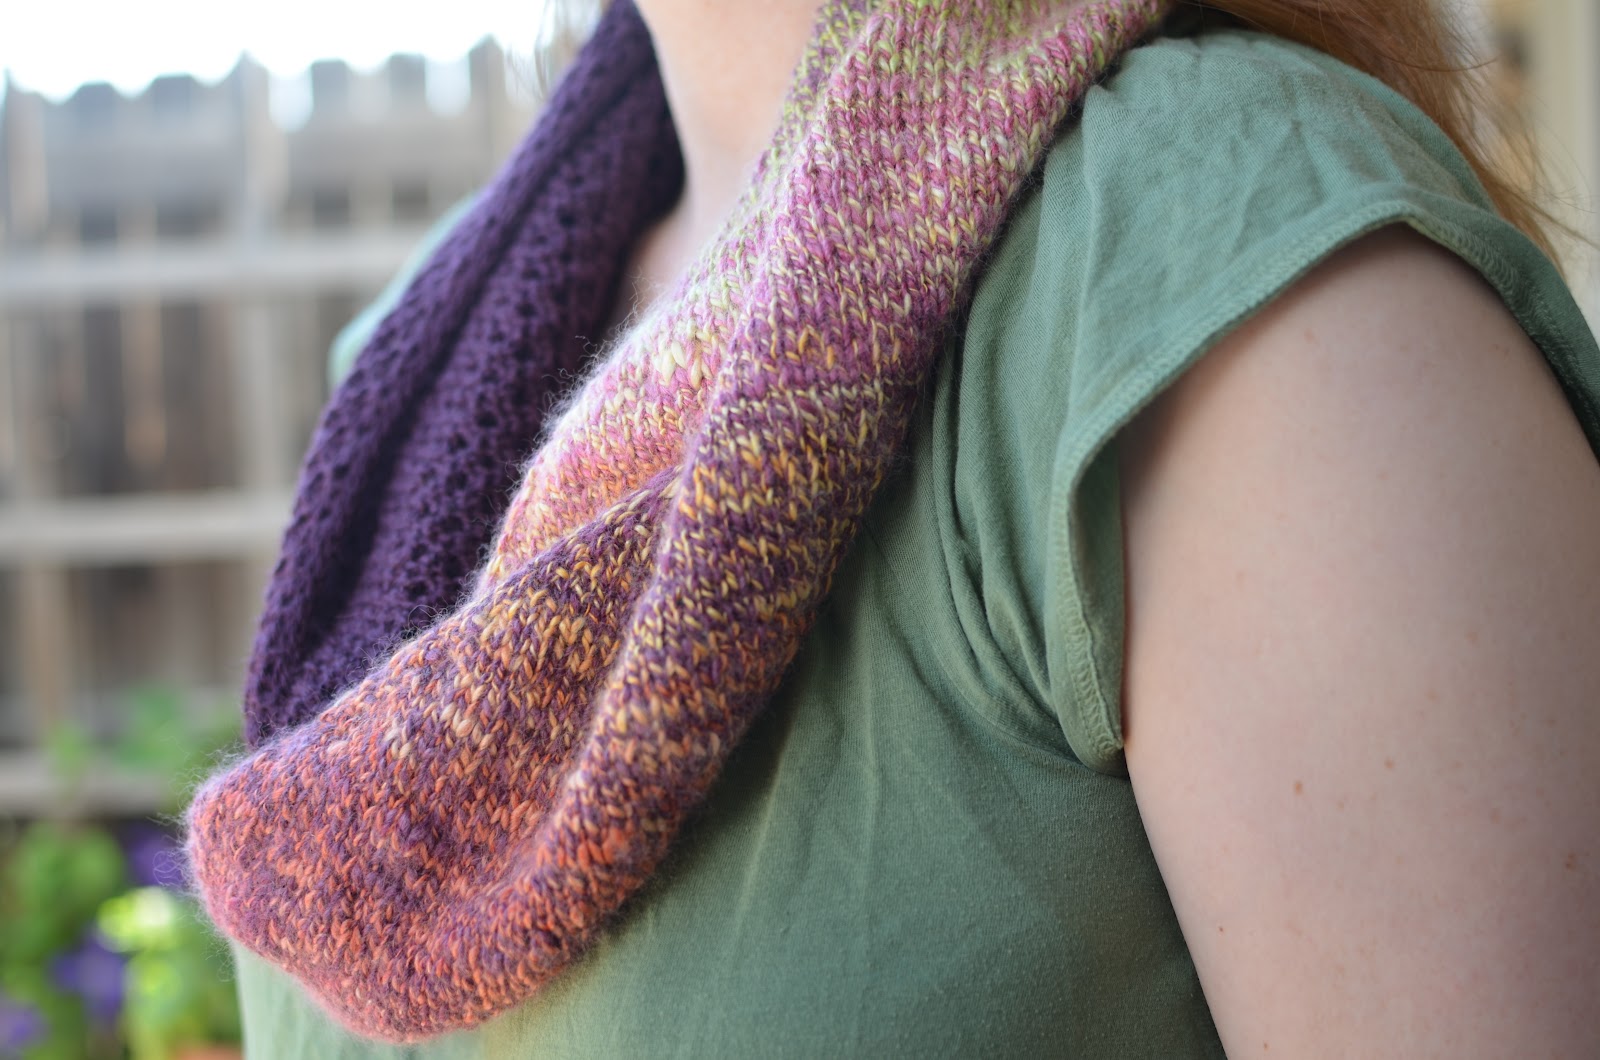
So here are my three skeins of homespun yarn, ready to be knit!

I chose to make the Trixie Cowl pattern. I needed a complimentary yarn. I found a dark purple alpaca and silk blend from Blue Sky Alpacas that worked nicely with my own yarn.

After knitting the scarf it needs to be "blocked." This will set the form and even out stitching. Another soak in the sink.

And another squeeze in a towel.

Then pin it to shape on a blocking board. Let dry for a couple days.

This pattern has you block the piece flat before joining in a loop. Be careful not to be too distracted by Colin Firth's smoldering portrayal of Mr. Darcy, or you might join the wrong ends together. That will make you angry and have to spend a lot of time un-picking that rueful kitchener stitch.
Then you are finished! Wait for daylight and take some final pictures. Don't include your head if you slept in, have frizzy hair, and no make-up. Do include your kid because he's cute 24/7.


Finally, update your Ravelry page. Here's my Ravelry page for the finished scarf.
Final step: go to etsy and browse for roving ;-)
1 comment:
That was a really cool post!
Post a Comment